ADGuard is free ad-blocking software and a service that can protect your personal or enterprise devices from online advertising, trackers, and malicious sites across your web browser or applications exposed to the internet. It contains management features such as filtering rules, DNS filtering, and network protection. This software also serves as a router, providing as a perfect solution for home networks. In this lab, I’ll walk you through the configuration process of setting up ADGuard and how it can be used to protect your network.
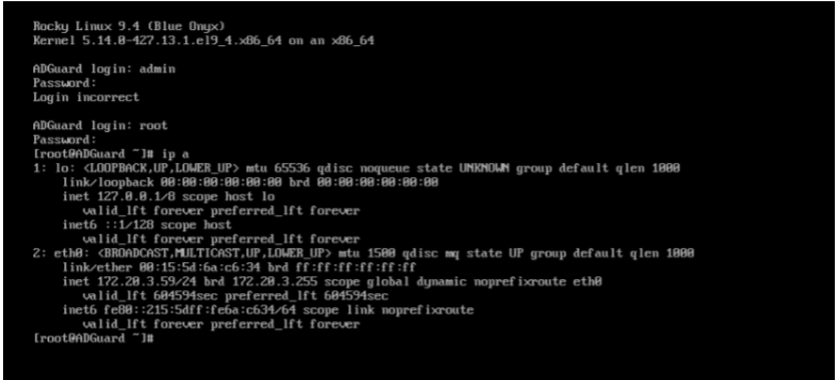
For this lab, I had to configure a dedicated VM to remote into via using putty software. In this example, I used a Rocky Linux machine and set it up as “minimal install”, giving me only a command line interface (CLI). Above shown in the CLI are the different network interface cards (NICs) in Rocky. The first one contains the Wide Area Network NIC and the Second one contains the Local Area Network NIC.
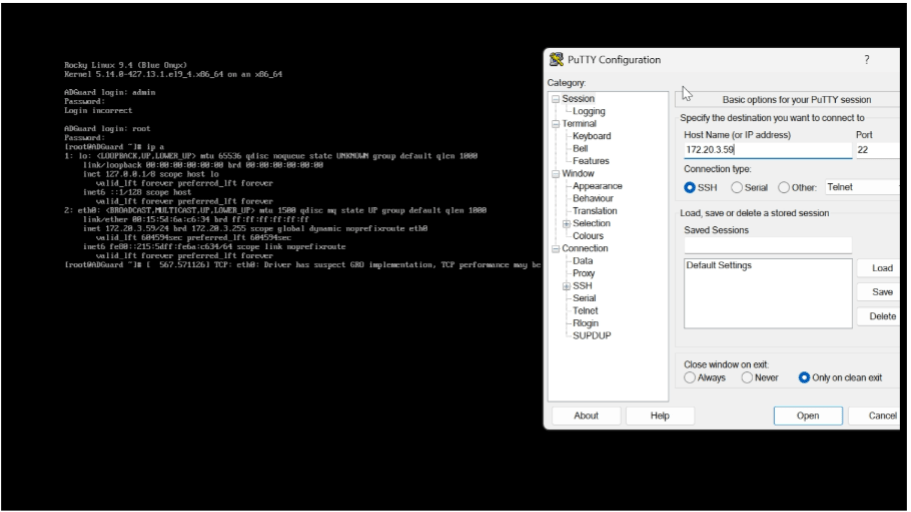
Once the minimal install was complete, I then accessed it remotely via using “Putty” software. By entering in the IP address from the Rocky Linux machine’s LAN NIC. I connected using SSH on port 22. When I was in with Putty, I then logged in as root admin to set further instructions and features for Rocky. I updated the virtual machine by typing in the script, “dnf -y update” inside of putty, which gave Rocky the latest features to install a firewall. The list of commands for Putty to install the firewall configurations were:
- curl -sSL
https://raw.githubusercontent.com/AdguardTeam/AdGuardHome/master/scripts/i
nstall.sh | sh -s — -v
2. firewall-cmd –new-zone=adguard –permanent
3. firewall-cmd –zone=adguard –add-source=X.X.X.X/24 –permanent
4. firewall-cmd –zone=adguard –add-port=3000/tcp –permanent (edited)
5. firewall-cmd –zone=adguard –add-port=443/tcp –permanent
6. firewall-cmd –zone=adguard –add-port=53/udp –permanent
7. firewall-cmd –zone=adguard –add-port=80/tcp –permanent
8. firewall-cmd –zone=adguard –add-port=22/tcp –permanent
9. firewall-cmd –reload
The following list of commands for Putty established the proper firewall rules and configurations to access it from our host machine, giving me a GUI interface for web browser interactions.

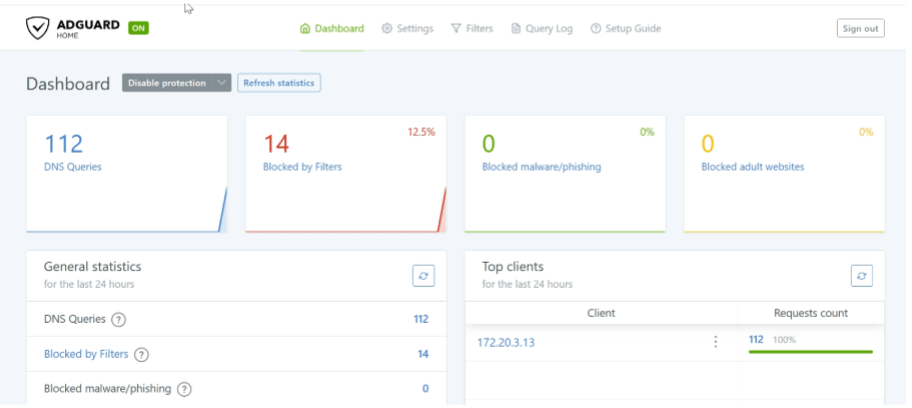
When Putty finally displayed that the commands above were successfully executed, I then accessed my personal web browser’s URL on my Windows 11 host machine and typed in the IP address from Rocky, which was 172.20.3.59. This gave me a graphical user interface for my host machine, offering a dashboard full of management features. It includes options to block, filter, or monitor any web traffic communicating with my host machine. Ads are automatically filtered on each website I visit based on my pre-configurations.
